Don’t stay confused wondering why your trailer running lights are not working. Find out the reasons quickly with the right troubleshooting tips.
My guide states the factors that could be responsible for running lights not working on trailers as well as how to pinpoint the cause of the fault. There are also answers to three frequently asked questions that may interest you.
So let’s get started without further ado.
Ground Wire Not Connected Properly
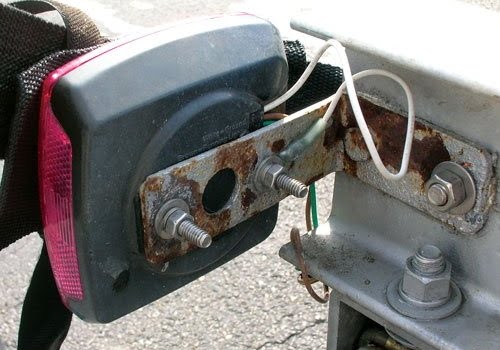
The ground wire may have a faulty connection that needs rectifying. It could be a case of corrosion, accumulated dirt, or rust. You should also examine the wire to ensure that it isn’t connected to a surface that is painted. The following can interrupt the ground:
- Tilt beds
- Aluminum frames
- Folding tongues
- An obstruction between the metal trailer frame and a light ground
Solution:
Run jumper wires to the main trailer connector ground directly from the light grounds to resolve the above issues
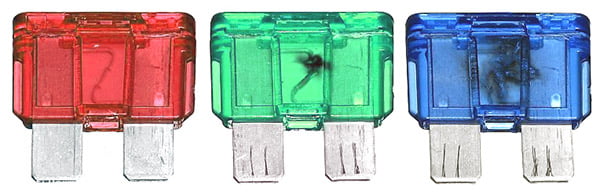
Blown Tow Package Fuse/Relay
Examine the relays/fuses for any fault or damage. Swap out the affected components if you notice something wrong. A vehicle tow package fuse could be the culprit.
Wait, what fuse controls trailer running lights? Look for where the relays/fuses linked to the tow package wiring locates with the aid of the vehicle’s manual. Inspect them and make the necessary replacements.
You can move on to checking the bulbs and fuses in all the trailer lights once you are through with the above checks. The bulbs and/or fuses may have stopped working as a result of burnout that could have been caused by various reasons. Blown fuses will disrupt the power supply.
Solution:
Whatever may have happened, the affected parts would have to be swapped out.
Faulty Vehicle Side Connector
Proceed with investigating the vehicle side trailer connector, provided that the source of the problem is not a bad relay or fuse. Perform the test with the aid of a circuit tester. Follow the steps below.
- Switch on the truck’s headlights.
- Test the pins on the connector behind using the circuit tester for power. No power? This means there is a bad/ insecure connection at a point between the connector and where it ends (the front of the vehicle). You will have to trace the affected part.
A defective vehicle side connector or wire can cause the trouble of trailer lights not working. It can be loose wiring, corrosion, or fraying (wearing).
What about the possibility of a terminal that isn’t fixed in place or one that is malfunctioning? The accumulation of corrosive materials can damage the terminals.
Solution:
Re-tightening or rewiring with new cables depending on the condition of the old cables. Clean the terminals and re-tighten them or perform a replacement if necessary.
Faulty Trailer Side Connector
Switch your focus to the trailer side connector as long as you are convinced there is no problem with the vehicle side connector. Be certain that every part of the trailer side connector is dirt-free (no corrosive materials).
It is necessary for the grounds for every trailer light and the main connector ground to be connected for cleaning to take place. This will help you take care of corrosive materials easily and ensure that the metallic surfaces won’t wear away.
There will be an issue of trailer lights not working if its side connector or wiring is bad. Check the terminals as well. The same things (wear, fraying, and detachment) that can happen to the vehicle side connector may have happened here.
Solution:
You would have to get the trailer rewired or tighten any loose connection to deal with the issue. As for the terminals, clean and tighten or replace them according to the conditions.
Read more: F150 Windshield Wipers Won’t Turn Off: Don’t Panic!
Trailer Running Lights Not Working – FAQS
Do Trailer Running Lights Have a Fuse?
Yes, the trailer running lights have a fuse. The location will vary depending on vehicle type and even model year. For example, on a 2009 – 2014 Ford F150, the fuse for the trailer running light is the 5th one from left to right on the bottom tow. It’s a blue 20 Amp.
Where Are The Fuses for Trailer Lights?
You can find the fuse for trailer lights in the vehicle’s fuse box/panel. Generally, check the vehicle owner’s manual to find the location of the fuse box. Fuse boxes of recent Ford F150 models are typically situated in the passenger footwell or engine compartment.
For the passenger footwell, check its right-hand side (at the back of a trim panel). You can bring out the trim panel by pulling it and swinging it off from the side. Take off the fuse panel’s cover by pressing in the tabs on its two sides and pulling it away. The fuse box in the engine compartment should be visible in a few seconds after popping the hood open. It can be seen on the far-left side or close to the front of the compartment.
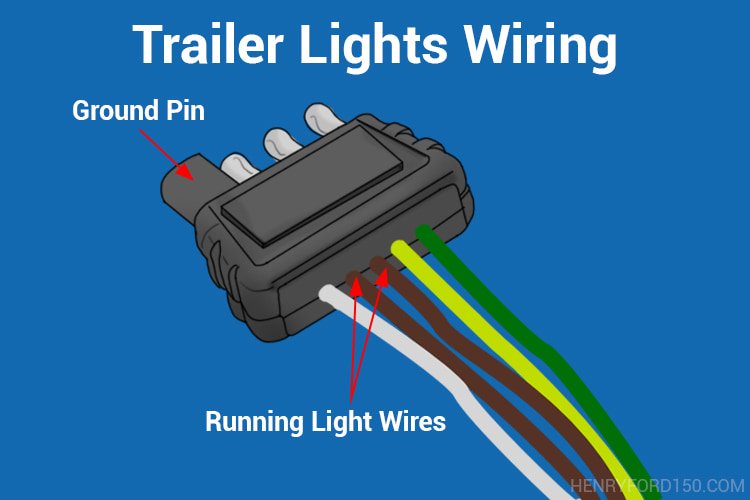
What Color Wire Is The Running Lights on a Trailer?
The following are the color wires of the trailer lights:
- Common or chassis ground wire – white
- Brake lights/left turn signal wire – yellow
- Brake lights/right turn signal wire – green
- Running/tail light wire – brown
Some Final Thoughts for Trailer Running Lights Not Working
Now you know the places to look on your own when trailer running lights are not working. Be wise to hire an auto technician to deal with the issue if you aren’t sure what you are doing. Performing the troubleshooting processes with inadequate DIY skills can make things worse. And that may lead to paying more money to a professional with extra bucks for replacement parts.